Ahhh...MOMMY TIME
Well, my Christmas crafting has finally come to an end. Tuesday night I stayed up WAY past my bedtime wrapping, labeling, tying bows and sorting out all of our homemade gifts. The girls delivered their teacher gifts on Wednesday and I dropped by a few of our neighbors' houses to spread some Christmas cheer on my way to and from picking them up from school. I still have to catch up with a few more friends and neighbors, but I have boxed everything up and it's in my car so I can easily deliver things when the opportunity arises.

Even though my house is a total mess, I can finally see the light at the end of the tunnel. I had planned to be completely done wrapping by now and I haven't really even started, but that's okay. It will all get done. I still have a handful of projects that I plan to post for my Twelve Days of Homemade Christmas countdown, but for now, I just need a little "Mommy Time." I hope you will excuse me if I share what I did last night when I was supposed to be getting to bed early...

I tried to relax, I really did. I even turned on the T.V. and found a show on Hulu Plus that I hadn't seen yet, but there it was, just staring at me. Taunting me... My empty, haphazard mantle! This year we decided to hang the stockings above our pellet stove in the Family Room, so our beautiful Living Room mantle above the real fireplace has been uncharacteristically bare. I have just been WAY too busy making gifts to come up with something I'm happy with.
I have had clippings from our Christmas tree all cut and sorted for weeks now, just waiting for me outside, but for one reason or another I just haven't gotten around to doing anything with them.With less than a week until Christmas, time was of the essence. Our Christmas budget has been met and exceeded at least 3 times over despite my best efforts, so buying something for the mantle was just not an option. No, I needed to get creative and use things that I had on hand. Plus, now that I was"relaxing" I had decided that something must be done right away to remedy the naked mantel situation. I mean, how could I possibly sit on the couch and look at that ugly thing all night?!

I thought for a bit, and decide that Mason jars would be my choice...And the greens outside, that were most likely wet (again) and that I had to go out in the dark to retrieve. Oh well, it was time to set my fear of the dark aside and rise to the challenge. My goal was to decorate the mantel and have it all completed and cleaned up before Mr. J got home from work so I could pretend that I relaxed all night and got to be early. :) So, I grabbed my jars, washed them and dried them. I grabbed some silver beads, 1/2 of a bag of cranberries from the fridge, old pillow stuffing (snow,) and whatever real and fake candles I had in my candle cabinet. Then, I put my headlamp on and turned on all of the outside lights. I grabbed my gardening shears and dragged my poor dogs outside with me at 10 o'clock at night so I could gather my mantel decorations.

When I came back inside with all of my finds, I went straight to work. I quickly consulted with Pintrest and settled on a design. It only took me about twenty minutes, but I think it came out nice considering that it was completely free and essentially thrown together. It was also a nice break for me to create something just for me. Some Mommy time was definitely in order and now I feel refueled and ready to clean the house, wrap presents, cook, bake, and share the last four days of Homemade Christmas with you. Who knows, maybe I'll even be able to sit down for more than five minutes tonight to wind down for the day. Although, I do have an awful lot of greens left and no dorr decorations up yet...
Thanks for letting me have some much needed "Mommy Time!"
Merrily Yours, Mrs. J :)
 With nasty weather fast approaching, the pressure was on to finish siding the goat barn. A few years ago my father in-law and I built a wood shop for me to work in, and he had the insight to put a roofed storage area on the back. From the front of the shop it looked like it was a solid building but on the side it was open to store stuff . When we got the goats, we started by enclosing a 10' by 10' section of the roofed storage area, but as the herd started to grow we realized that they would need more room. We ended up making the roofed area around 25' by 10', and the outside pen where they run around in is about 16' by 36'. One of my neighbors just replaced some of his windows and was nice enough to let me have his old windows. I picked up some more siding from the local lumber store, and nailed up. Slapped in the windows and was done right before the wind and snow got here.
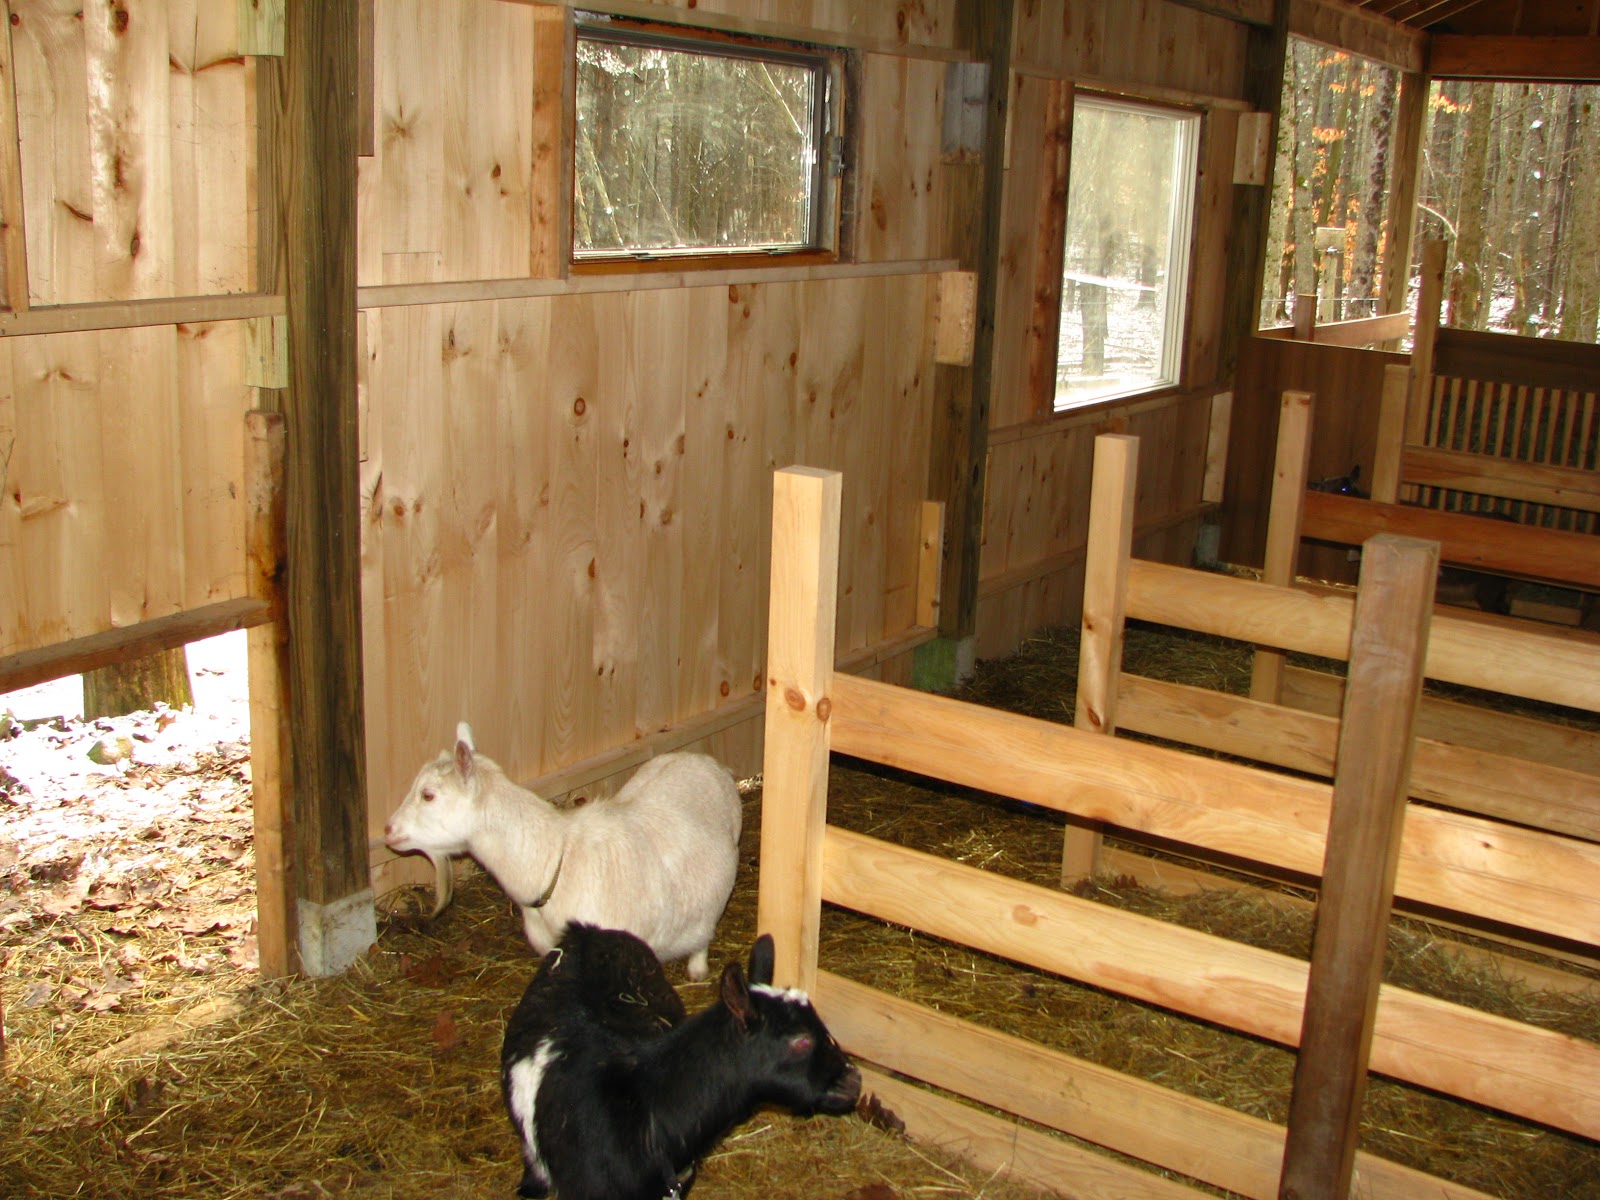
 The goats seem a lot more comfortable since the walls and windows been installed and appreciate no wind blowing on them. I still need to put casing around the outside of the windows, but I think that can wait tell spring time.
 A few weeks ago I saw a post on craigslist for nigerian dwarf goats for sale, and they were in the next town over. I went to go check them out to see what they had, and to meet another nigerian goat owner. When I got there, I was very impressed with their set up and the goats. I then found out that all their goats came from Old Mountain Farm , a breeder that puts out some of the best goats around, and she was selling them for pretty cheap. Did I ever say I appreciated a good deal, some might even call me cheap. I left the farm with my wheels spinning in my mind. Aspen was supposed to breed with Atreus while he was staying at our place, but we think she never cycled due to a copper deficiency. If we picked up a new goat we could introduce some different lines into the herd and get the new doe to breed with Atreus while he was still here. I talked to the wife, and after I explained everything to her she was on board. We all went to the farm and picked out a cute little fluff ball of goat who also had great conformation. We brought her home and within a couple of days she was part of the herd. The only problem we had was that Atreus had to go back sooner then we thought and the new goat, named Katy Lane, was only with him for ten days. We'll have to wait tell spring time to see if magic was in the air.


