Saturday, January 26, 2013

Leroy The Rooster

   This past summer we ordered six buff orpingtons along with our meat birds. They also threw in one extra bird of their choice. As the birds grew up we noticed that one of the buffs started to look a little bit different. It started to grow taller than the rest and have different types of feathers. After about six months of growing we came to the conclusion that the hatchery had given us a buff orpington rooster by mistake, something that does happen from time to time. Also, our free chick turned out to be an araucana rooster as well. Knowing that two roosters in a hen house is not a good thing, I quickly found a new home for him. He's with some other araucana hens and is very happy.
   Leroy seems very happy with his flock too and watches out for everyone. He hasn't shown any aggression toward me, or the rest of the family, and is now just starting to practice crowing. We'll see how that goes... We're hoping that he will help in guarding the flock against any predators this summer.
   We chose the buff orpingtons because they are easy going, have the ability to hold up to Maine's winter weather, and are good egg layers. Now that we have a rooster their other characteristics are going to help us out as well. The orpingtons also tend to be broody, which means they will hatch their own eggs and take care of their young. They also are big enough birds to eat if we have to cull out the roosters.
   The new plan is to try and hatch only the buffs' eggs and eventually cull out all of the other chickens as they get too old. Miss E can't wait to start hatching chickens this year and have a bunch of new chicks to take care of.


Friday, January 11, 2013

Sausage Fest

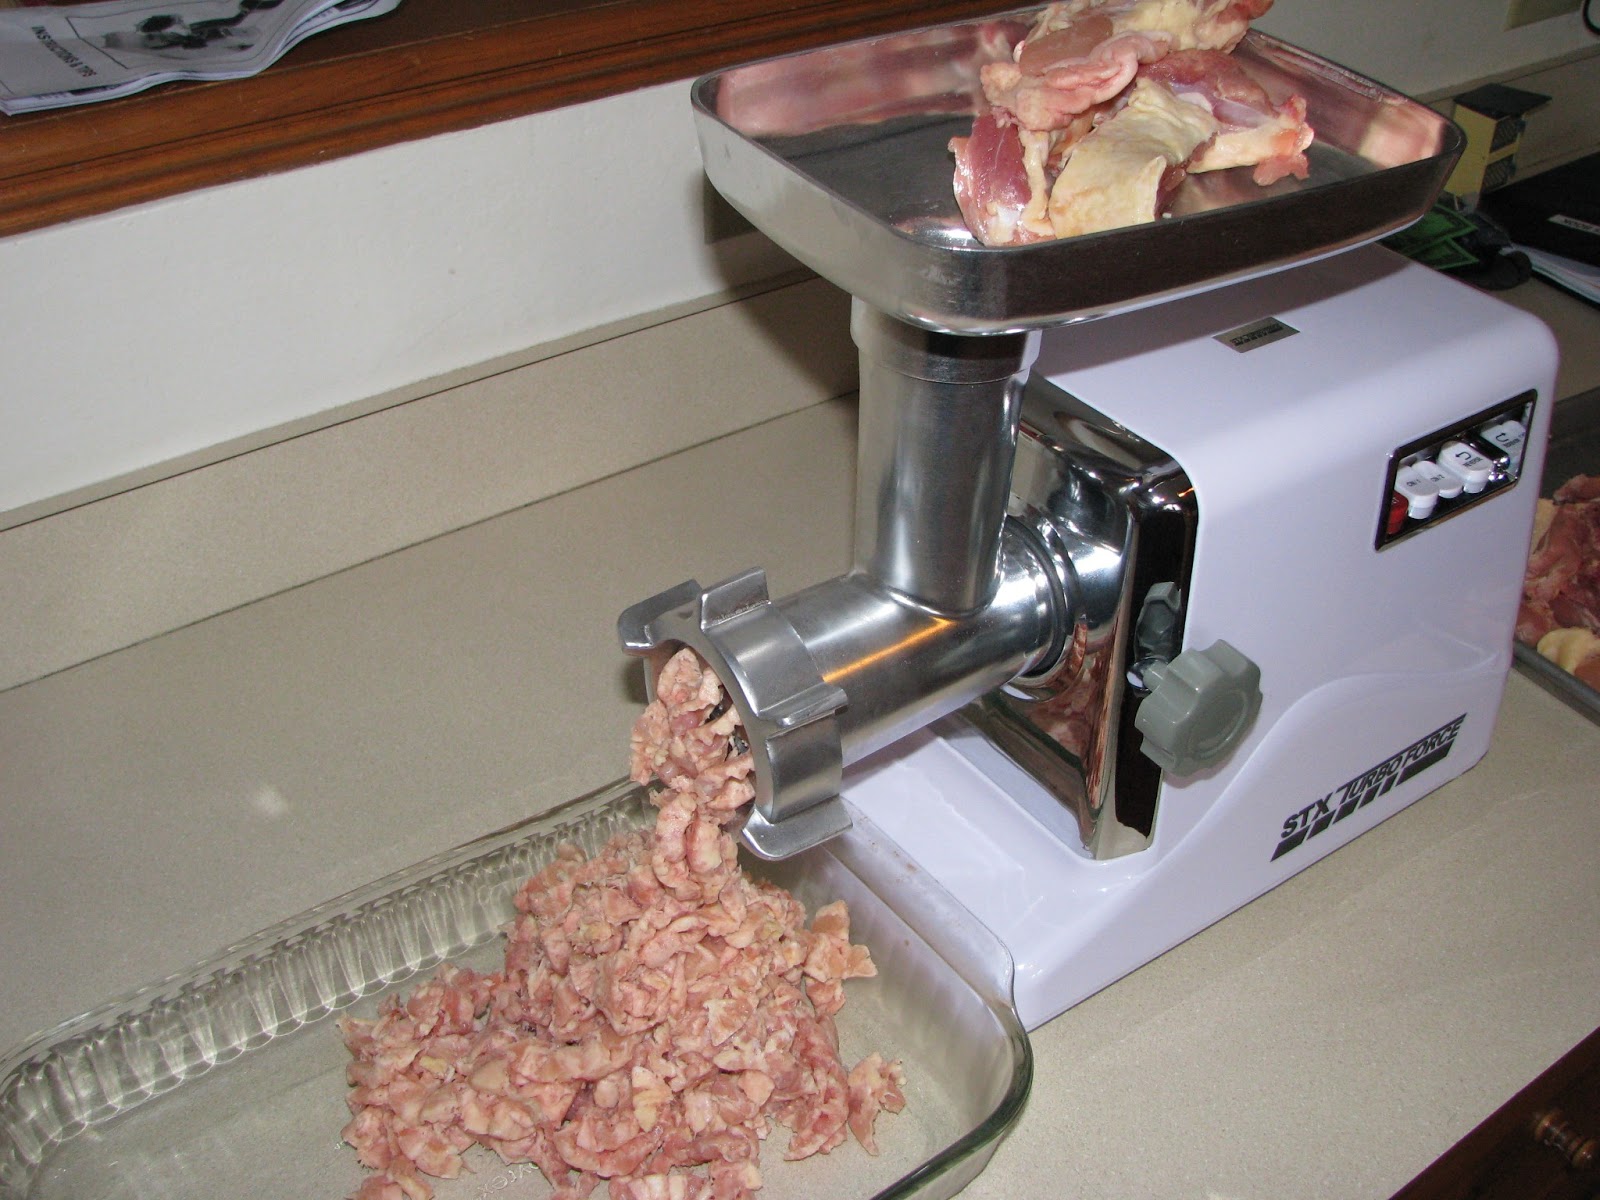
   For Christmas, my mother-in-law got me a meat grinder/sausage maker for us to use as we get into more processing of our own meat. After doing a lot of research on them, I decided on the STX turbo Force 3000. I added it to my Amazon wish list, and low and be hold I ended up getting it for Christmas. I couldn't wait to get through the aftermath of Christmas and start using it.
   I was able to purchase some natural casings, hog intestinal, from the local butcher shop and they also were able to give me some advice on sausage making. We didn't want to waste any of our natural pork or chicken on our first time trying to make sausage, so I bought ten pounds of chicken thighs at the store. We wanted to try two different types of chicken sausage, so I divided the ten pounds of chicken into two piles, cut out the bone, and then cut the meat into one inch strips, leaving the skins on.
  I then put the strips on a pan, and put them into the freezer for about half an hour. They say the meat grinder will work better if the meat is almost solid. Once the chicken strips were firm but not frozen, it was time to start grinding. We started with the attachment that does the coarse meat first. It worked very well, didn't have to force the meat in at all.
   We piled the meat on a dish as it came out of the grinder and then put on the finer attachment and ran the meat through the grinder again, as the meat came out we put the meat into two different bowels. We then added the two different seasonings that we made a head of time. Using a spoon we mixed up the meat thoroughly making sure the spices were incorporated into the meat. They say that you should let the meat rest in the fridge overnight so the flavors get into the meat, but didn't want to wait that long, besides the flavors will be in the sausage once made and will have plenty of time to rest then. Before we used the meat in the sausage, we fried up little patties on the stove to try them out, and see if they tasted good. We then started getting ready to stuff the casings.
    I put the coarse attachment back on, but on the end of it I also put the stuffing tube on. I painstaking pulled about ten feet of casing over the tube and scrunched up against the base. Once on, tied a knot on the end and was ready to go. We later discovered that it was easier to have the meat fed all the way to the tip of the tube and then pull the casing on, the little bit of meat on the end made like a cone to help feed it on.
   Once we got the casing on, we scooped the clumps of meat on to the loading tray and used the pushing rod to feed the grinder, as the meat got fed through the machine it would fill up the sausage casings. As they got about six inches long we would twist the links and started another one. We did all the breakfast ones first  then went on to the tomatoes ones, that way the breakfast ones didn't taste garlicky. I turn out to be a pretty easy process and are looking forward to using our own meat to make the next batch.

Apple Breakfast Sausage:

5 Lbs Chicken Thighs
3/4 Cups Brown Sugar
2 Apples Deiced
1 1/2 Tbls Cinnamon
1/4 Tsp Nutmeg
1 Tbls Salt
 1/2 Cup Olive Oil
We made this with the sugar to help entice the kids to eat it for breakfast, you can omit it if you want but the kids ended loving it this way.

Sun Dried Tomato and Basil:

5 Lbs Chicken Thighs
1 Cup Sun Dried Tomatoes
1/2 Cup Basil Leaves
1/2 Head of Garlic
1 Tbls Rosemary
1 Tsp Thyme
1/2 Tsp Oregano
1 Tbls Salt
1 Tsp Pepper
1/2 Cup Olive Oil

We put the tomatoes and basil in the mini processor to cut them up before mixing them with the other spices.


Friday, January 4, 2013

Homemade Corn Nuts

    This past summer, we had a surplus of sweet corn that we couldn't eat in time before it got too much of a starchy taste, so we left them on the stalk to dry out. After the stalks dried up we picked the corn and hung it up in the basement to finish drying. We weren't sure what we were going to do with it at the time, but after eating a bag of corn nuts, we decided to try to make our own.
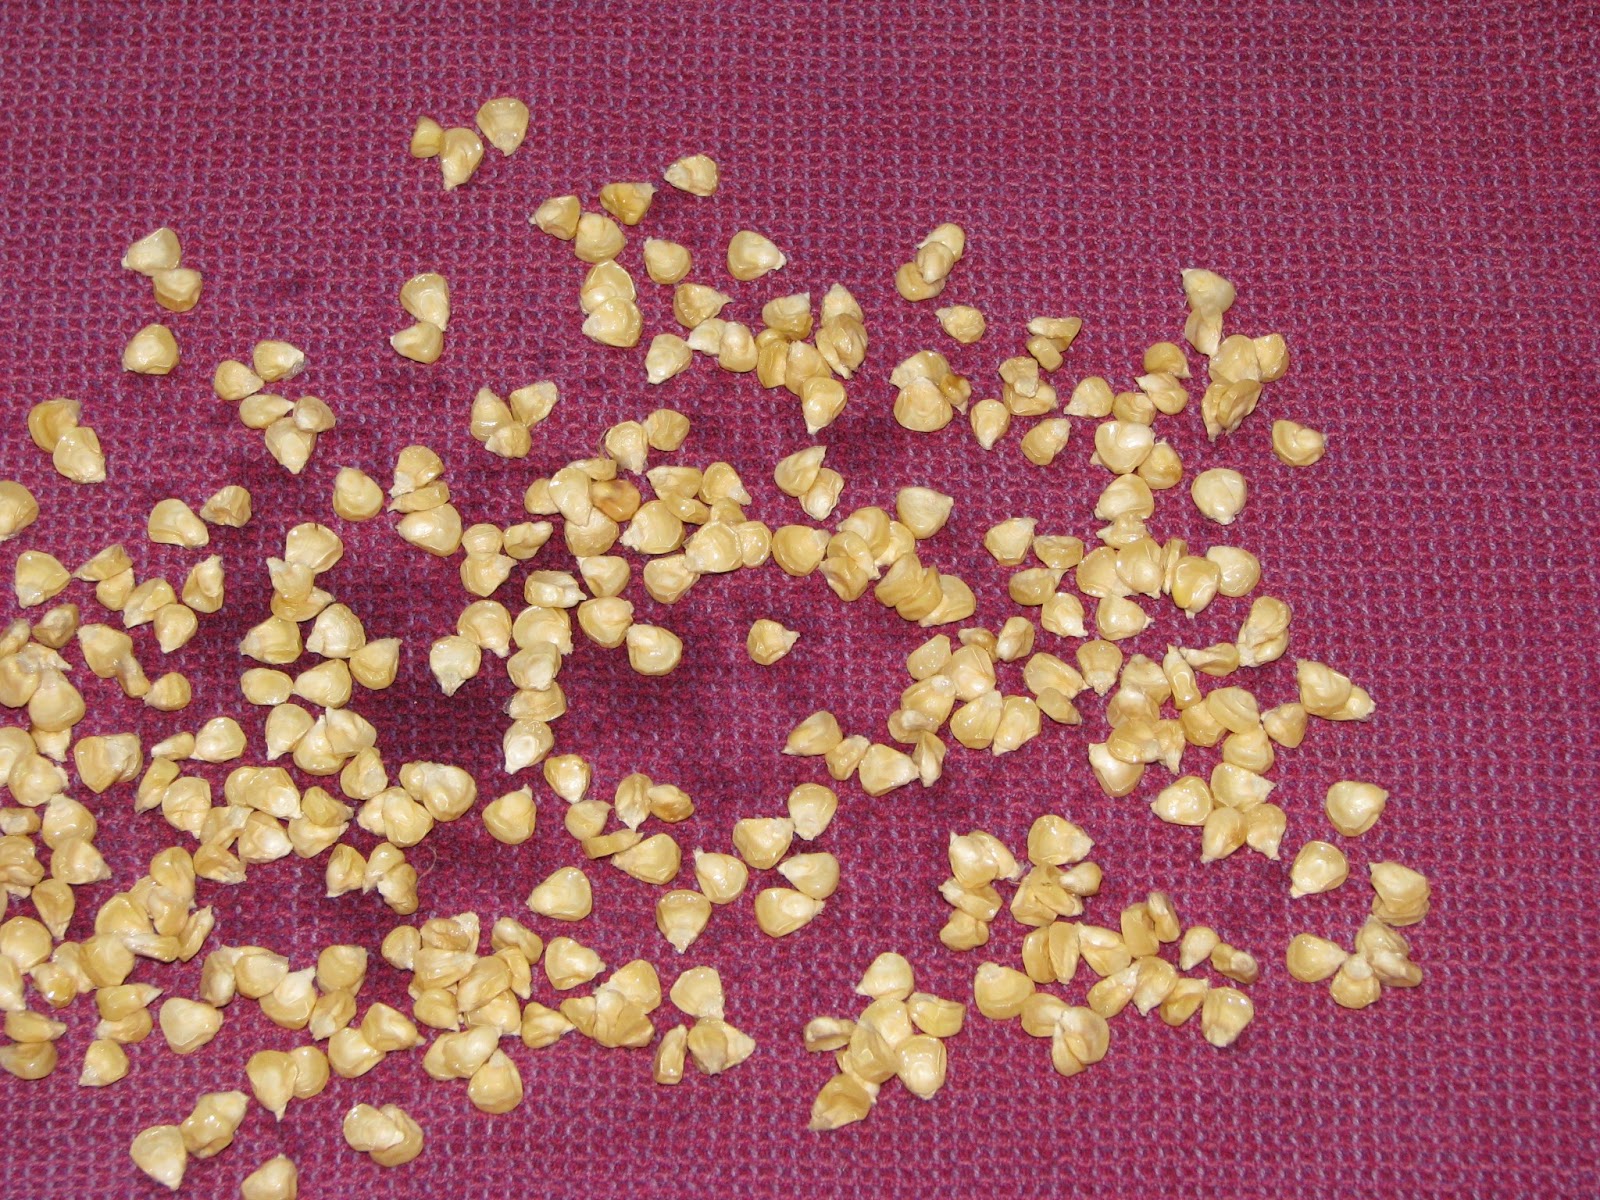
   What I did first was, shuck the corn off the cob and then put the corn into a bowl with enough water to cover the kernels. I left the corn in the fridge for three days or so. The water that is absorbed helps make the kernels almost pop and swell up. After the kernels absorbed some the water, I strained them through a colander and, then laid them out on a dish towel to air dry.
   While they were drying, I heated up the deep fryer to 375 degrees. If you don't have deep fryer, you need to get one they're great. Once dried I put them in the deep fryer for about seven minutes, once they started looking golden brown, I took them out and dried them on a paper towel. I then sprinkled them with some salt, and the whole family enjoyed eating them up.  
   The kinds you buy at the store are made out of a different type of corn, Hickory King Corn, but we wanted to try to use the corn we already had.


I know there is nothing healthy about taking a starchy, sugary food and deep frying it and then puting salt on it, but who can be healthy all the time?


Thursday, December 27, 2012

The Goat Barn

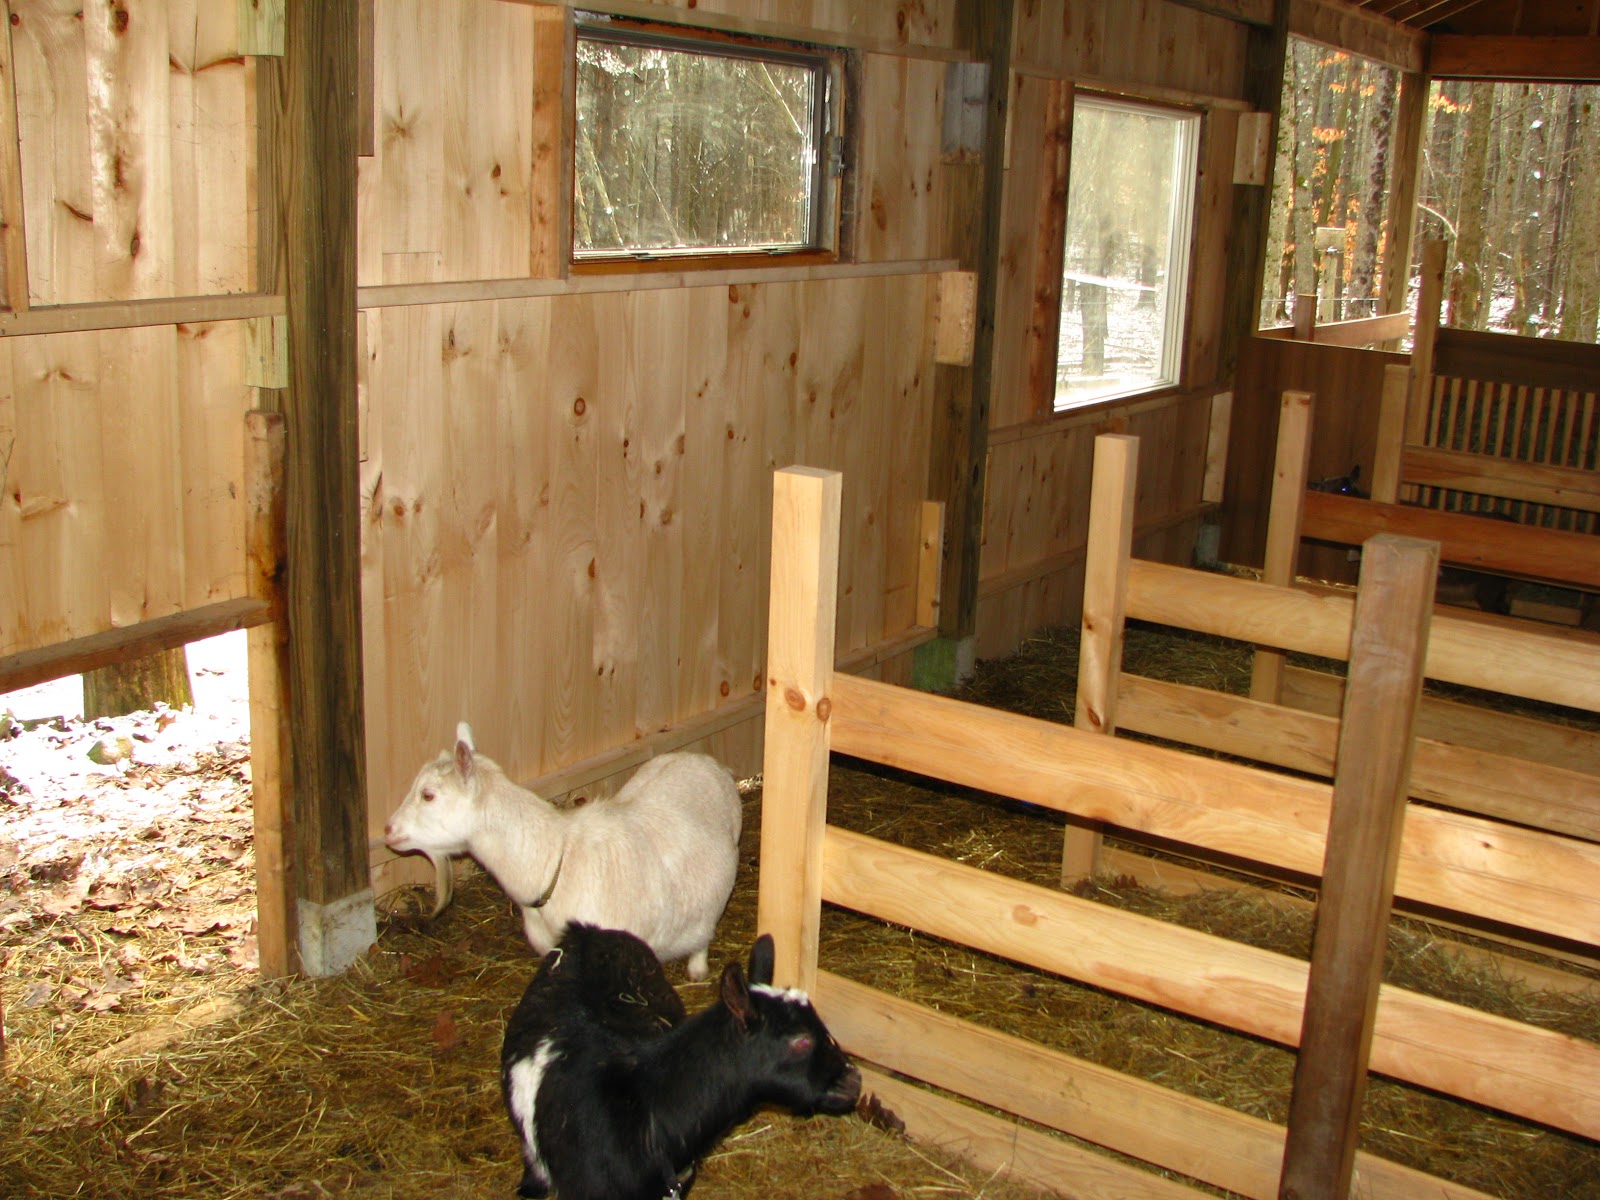
   With nasty weather fast approaching, the pressure was on to finish siding the goat barn. A few years ago my father in-law and I built a wood shop for me to work in, and he had the insight to put a roofed storage area on the back. From the front of the shop it looked like it was a solid building but on the side it was open to store stuff . When we got the goats, we started by enclosing a 10' by 10' section of the roofed storage area, but as the herd started to grow we realized that they would need more room. We ended up making the roofed area around 25' by 10', and the outside pen where they run around in is about 16' by 36'. One of my neighbors just replaced some of his windows and was nice enough to let me have his old windows. I picked up some more siding from the local lumber store, and nailed up. Slapped in the windows and was done right before the wind and snow got here.
   The goats seem a lot more comfortable since the walls and windows been installed and appreciate no wind blowing on them. I still need to put casing around the outside of the windows, but I think that can wait tell spring time.
   A few weeks ago I saw a post on craigslist for nigerian dwarf goats for sale, and they were in the next town over. I went to go check them out to see what they  had, and to meet another nigerian goat owner. When I got there, I was very impressed with their set up and the goats. I then found out that all their goats came from Old Mountain Farm , a breeder that puts out some of the best goats around, and she was selling them for pretty cheap. Did I ever say I appreciated a good deal, some might even call me cheap. I left the farm with my wheels spinning in my mind. Aspen was supposed to breed with Atreus while he was staying at our place, but we think she never cycled due to a copper deficiency. If we picked up a new goat we could introduce some different lines into the herd and get the new doe to breed with Atreus while he was still here. I talked to the wife, and after I explained everything to her she was on board. We all went to the farm and picked out a cute little fluff ball of goat who also had great conformation. We brought her home and within a couple of days she was part of the herd. The only problem we had was that Atreus had to go back sooner then we thought and the new goat, named Katy Lane, was only with him for ten days. We'll have to wait tell spring time to see if magic was in the air.


Monday, December 24, 2012

The Twelfth Day of Homemade Christmas

Bath Crayon Stocking Stuffers


     I had to share one more stocking stuffer that I made the kids. These are bath crayons made from soap shavings. I found these on Pintrest a while back and had planned to try and make them with the kids, but before I knew it, Christmas season was in full swing, and I decided to make them as stocking stuffers instead. These are definitely something that you could make with children, but they are pretty messy, just to warn you!

So, here's what I did:

     
      I used my hand grater to make 4-5 bars of plain Ivory soap into shavings. I separated the shavings into 2 different bowls. Then, I slowly added water and food coloring a little bit at a time, stirring as I went along. It probably took about a cup or so of water and about 10 drops of food coloring, give or take. I wanted to make a nice, workable paste. This proved to be a little more difficult than I planned and I ended up using my hands so I could get right in there-that's the messy part! Once I had the consistency and color I liked, I used cookie cutters on a wax paper lined cookie sheet, and packed the soap paste evenly into them. Then, I set them aside in the basement to dry.
     It took A LONG time for them to dry and I ended up completely forgetting about them after a few days since I had tucked them away safely from plain site. I happened upon them about 2-3 weeks later, so of course they were dry by then! They had also kind of shrunk and were super-easy to pop out of the cookie cutters, which was something I had become a little concerned about in the first few days of waiting for them to dry.
     So, I popped them out of the cookie cutters, shaved off the brown edges with a knife, and packaged them in repurposed note card wrappers labeled with white contact paper labels, just like the regular crayons I made. I also saved the leftover colored shavings and I think that all I will have to do is add water to re-make a paste to make more. I can't wait to see how they work in the bathtub... And, who knows; maybe once I get into making my own goat milk soap, I will make goat milk soap bath crayons. Fun, fun, fun!
     
             
     I hope you have enjoyed the Twelve Days of Homemade Christmas as much as I have! I have done quite a bit more crafting this holiday season that what I have shared on our blog, but I did not want to reveal any of the gifts I will be giving tonight and tomorrow, so I will have to share some of my other creations with you another time. 
     Making this 12 day commitment has been much more time consuming than I had imagined! For those of my friends who blog every day, and have little ones to raise, my hat goes off to you! I will be stepping back a bit for a few days so that I can focus on my family. Miss E and Miss D will be home on school vacation through January 3rd and we have A LOT of family fun-time ahead...
     I am sure that Mr. J will be happy to get back to his farm talk as well. He won't say it, but I am certain that I've seen him roll his eyes at some of the "girliness" that has been thrust upon his blog over the past 12 days! Merry Christmas and Happy New Year everyone and thanks for following along with our journey as we muddle our way through life as small farmers learning to be more self-sufficient.

Merrily Yours,  Mrs. J :)

Sunday, December 23, 2012

The Eleventh Day of Homemade Christmas

Simple Sugar Scrub

     Last year I made a HUGE batch of sugar scrub to divvy up into small canning jars for teacher, friend, and family gifts. I was amazed at how easy it was to make and the kids were happy to help. It's always nice when something is simple and safe enough to have my little helpers join me!
     Well, this year I did not make a HUGE batch, but I did make a small one to use as Yankee Swap gifts and I had enough left over to make a jar for myself. Ever since the cold weather has hit, and with all of the crafting I have been doing lately, my hands have been a mess!!!
     I found these cute little plastic spoons at the dollar store, and I just had to put one with each scrub. I think they really complete the look. Below is the recipe I used:

Gardner's Lemon Sugar Scrub

5 1/8 C. Sugar
2 C. Grapeseed Oil
6-8 TBSP Lemon Juice

     I mixed it all in a bowl and used a canning funnel to put it into pretty, clean jars that I had on hand.  I topped the lids with circles of fabric scraps before screwing on the rings. Then, I tied a tag and the cute, little spoons around the lids with twine, and fished off the whole package with a scrap of grosgrain ribbon. 
     These are super-simple to make and there are a million different recipes out there, so you can probably find one that you can make with things you already have in your pantry. If you are still looking for a last minute gift for that special someone, maybe you can whip up a cute jar of sugar scrub for them today...

Merrily Yours,   Mrs. J :)

Saturday, December 22, 2012

The Tenth Day of Homemade Christmas

Gone Fishin'
     Miss D and I made this fishing game for Mr. T. We already have a Melissa and Doug puzzle that is similar but Mr. T enjoys playing with beanbags so much that I thought this would be fun too! I bought the galvanized bucket at a craft store for a mere $1.49 and used only things that I had on hand to make the pole, fish, and bucket decorations.
     All I did was draw a simple fish shape on white contact paper and cut it out. Before peeling off the backing to decorate the bucket, I used that as my template for the fish beanbags. I used random scraps (some from the sweater pillows I posted yesterday too!) and sewed them, right sides together with a loop of ribbon inside and a washer threaded through them. I left the fish open at the tails, turned them right side out, and then Miss D used a funnel to fill them with rice. I quickly finished the tails with a decorative stitch and trimmed the edges with pinking shears.
     The fishing pole is just a weird plastic dowel that I had salvaged from one of the kids cheap dog walking toys we got at a fair. The toy fell apart within hours of being home and I had it in my craft room to repair, but since no one had asked about it I decided to disassemble it completely and re-use the parts for projects. It was really just a glorified weapon, so it's just as well! Anyway, Mr. J cut the plastic dowel to length for me and then I wrapped it in scraps of batting and sewed a "pocket" out of more leftover scrap fabric, to slip it into. I attached the ribbon to the end of the pocket for the fishing line. I turned the whole thing right side out, stuffed the wrapped plastic pole inside and finished it by hand.
     Once all of the fish beanbags were completed, I grabbed a magnet off of my fridge (one that Miss E stole from my brother's fridge over a year ago no less!!!) and tied it to the end of the ribbon. I cut out a letter T from patterned contact paper, and stuck it, along with the white fish shape to the bucket. I finished the whole thing off by tying a scrap like a bow on the handle of the bucket and Miss D and I wrapped and hid it in her bedroom closet until it's time to put it under the tree.
     She is so excited to give him his new fishing game, and is so proud of herself for helping Mommy make it! Miss E is usually my crafting partner so it was a treat for me to do something like this with Miss D too! I did some of the prep-work the night before, but we were able to fill and finish the fish beanbags and fishing pole all while Mr. J and Mr. T were out running errands one morning and Miss E was at school. It always feels good to spend quality time with on on my little ones, but it's even better when we're able to check something off of Mommy's never-ending To Do List at the same time!

Merrily Yours,  Mrs. J :)