Showing posts with label Butchering. Show all posts

Sunday, November 10, 2013

Pigs' Last Day on the Farm

I loaded the pigs on the trailer this morning and gave them a ride to the butcher. I'm happy to report that it was very uneventful, unlike last year. I didn't feed them the day before, so when I put a pile of apples and some grain in the back of the trailer all but one of them walked right in. The last one needed a little nudging with a piece of plywood and of coarse, she was the biggest one. I'm trying a different butcher this year and so far I'm impressed with the service and price. We can't wait tell Friday when I pick them up.


Friday, October 4, 2013

Cookin' Roosters

   This spring we hatched our own chicks in hopes of replenishing the chickens that eventually die or get eaten by predators. We thought the ratio between hens and roosters would be around 50%, but it seems like we have a lot more rooster than hens. Every time we think “that hen will be a neat to have in the flock” the hen turns out to be a rooster. We only need one rooster in the flock, and only one rooster crowing all the time. So what to do with all these roosters?
   There was a time when thinking about butchering a rooster was out of the question, but after raising meat birds and other animals its gotten easier to deal with. The reality is that our family is going to eat meat; it’s hard enough getting the kids to eat as it is and taking meat away would be even harder. If we are going to eat meat I would rather know that the animal lived a good life and had a quick death, not lived in a confined little area and never seen the light of day. It’s not easy to do, but some animals are born on our farm and some animals die here. I don’t think I would want it any other way.
    I only butchered two of our roosters, I’m waiting tell the rest get older to make sure they are roosters. I also did two roosters for someone that I sold six chicks to this spring. Someone else heard I was butchering roosters and asked if I would do four of his roosters as well. We ended up with eight roosters here waiting to be butchered, that’s a lot of crowing going on. I butchered them the same way I butcher the meat birds, so there was no problems to speak of. I bag them up, and gave the other people their roosters back to go live in their freezers. After a couple of days we roasted one of them to try it out. We found that it tasted great, but was a little bit chewier than a normal meat bird. We’re thinking that we might make chicken sausage with the rest of the roosters in the chicken coop. I also butchered one of the turkeys to see how big they were getting, 17.5 lbs. He is living in our freezer right now, but we’ll see him again on Thanksgiving.


Tuesday, July 9, 2013

Homemade Chicken Plucker II


   After last year’s failure at making a chicken plucker, I decided to try again this year. I went with the tub design, sometimes called a whiz-bang plucker. I’ve been working on it for awhile; slowly gather parts and looking up ideas on the internet
   First thing I started with is a squirrel cage that came from an old furnace blower. Someone gave it to me a long time ago and I’ve used it in different projects along the way. I used it to hold the plate up and give me something to mount the motor to. On one side of the squirrel cage I attached a 16” pulley that I had to order. On the other side, I took the original pulley off and used it as a template. I routed out a circle in a piece of plywood that was the same diameter as the pulley. Then I attached the pulley to the piece of wood with some screws. Using the pulleys edge, I used the router to cut the piece of plywood in a perfect circle. This will make sure the plywood is balance and won’t vibrate when spinning. I reattached the pulley and plywood back on the squirrel cage.
   Next I mounted a motor that I had kicking around the shop on to the squirrel cage . It happened to have the right pulley on it already. You want the plate to spin around 190 RPM, and most motors spin at 1750 RPM. I had to buy the belt that goes in between the two pulleys. Once the belt was attached, I used a piece of wood cut in the shape of a wedge and slid between motor and squirrel cage to adjust the tension of the belt. I then bought a plastic 55 gallon drum, that happen to hold Mnt. Dew before I got it. I cut the bottom off and cut then cut the top third off. To install the rubber fingers, which I ordered off EBay, I drilled 13/16” holes in the bottom of the drum and on the side of the drum. I then pulled the fingers through the holes and they stay there because they have a grove in the end that the edge of the barrel slides into. 
The fingers are ribbed to pull the feathers off as the chicken spins around barrel. Once all the fingers were installed I screwed the bottom to the plate which also helps hold the fingers in as well. I then used laminated plywood I had in the shop to build a box around the motor and squirrel cage, and then wired the motor up to a switch and then a plug. I turned the motor on and used a power planer on the plastic edge of the barrel to make sure it was perfectly round and centered. Next I attached the barrel on and used 2 x 4’s and plywood to support it. Put some old wheels on I had from an old barbecue and some legs and handles, and I was done.
   I had 47 chickens to process this weekend and hadn’t tried it out yet. We are going on vacation soon and had to process them before we left. I was very nervous after last year’s failure and didn’t have a plan B if this didn’t work. After dipping two dead chickens in some hot water to loosen the feathers, I put them in the plucker. Turn the switch on, and after thirty seconds of spinning around the birds came out with no feathers except for a few pin feathers on their tails, which is normal. I was very excited that it actually worked the way I planned it. I was able to process 24 birds in about four hours on Saturday, and finished the rest on Sunday in the same amount of time. I might make a few adjustments later on, but it worked out great and can’t wait to see if it will handle the turkeys this fall.


Friday, January 11, 2013

Sausage Fest

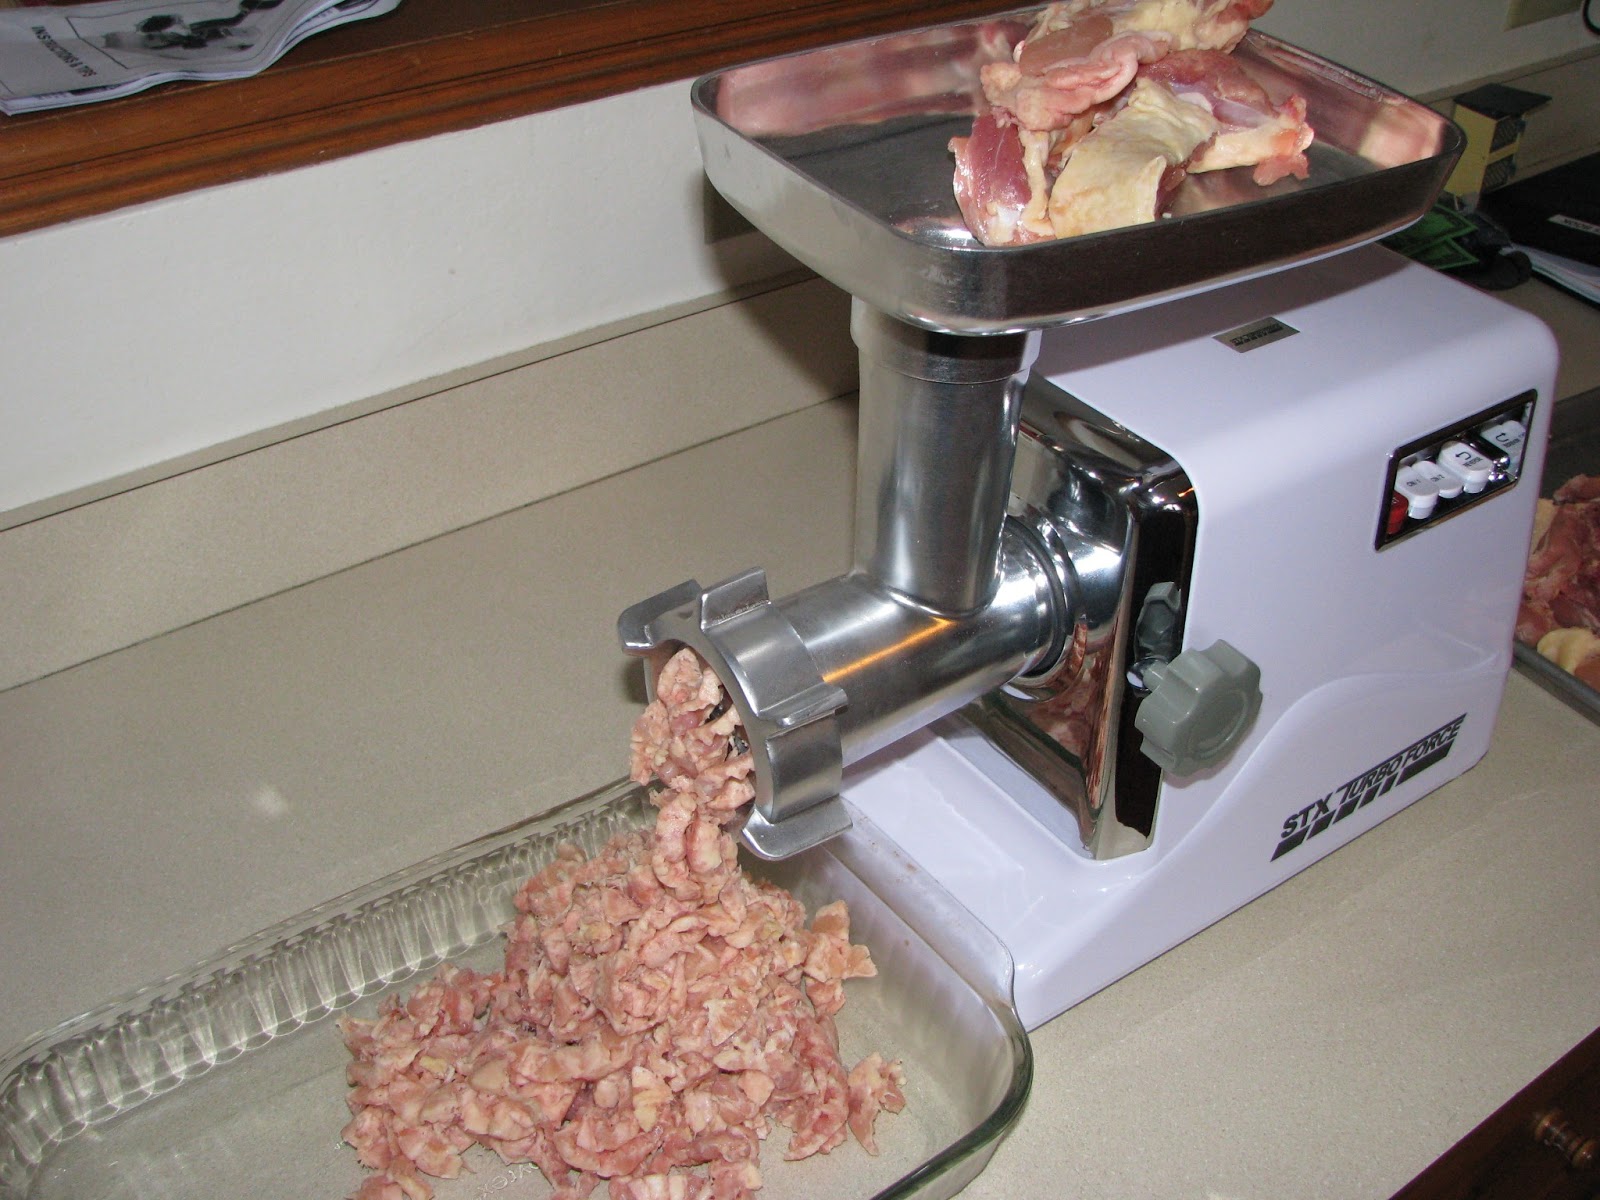
   For Christmas, my mother-in-law got me a meat grinder/sausage maker for us to use as we get into more processing of our own meat. After doing a lot of research on them, I decided on the STX turbo Force 3000. I added it to my Amazon wish list, and low and be hold I ended up getting it for Christmas. I couldn't wait to get through the aftermath of Christmas and start using it.
   I was able to purchase some natural casings, hog intestinal, from the local butcher shop and they also were able to give me some advice on sausage making. We didn't want to waste any of our natural pork or chicken on our first time trying to make sausage, so I bought ten pounds of chicken thighs at the store. We wanted to try two different types of chicken sausage, so I divided the ten pounds of chicken into two piles, cut out the bone, and then cut the meat into one inch strips, leaving the skins on.
  I then put the strips on a pan, and put them into the freezer for about half an hour. They say the meat grinder will work better if the meat is almost solid. Once the chicken strips were firm but not frozen, it was time to start grinding. We started with the attachment that does the coarse meat first. It worked very well, didn't have to force the meat in at all.
   We piled the meat on a dish as it came out of the grinder and then put on the finer attachment and ran the meat through the grinder again, as the meat came out we put the meat into two different bowels. We then added the two different seasonings that we made a head of time. Using a spoon we mixed up the meat thoroughly making sure the spices were incorporated into the meat. They say that you should let the meat rest in the fridge overnight so the flavors get into the meat, but didn't want to wait that long, besides the flavors will be in the sausage once made and will have plenty of time to rest then. Before we used the meat in the sausage, we fried up little patties on the stove to try them out, and see if they tasted good. We then started getting ready to stuff the casings.
    I put the coarse attachment back on, but on the end of it I also put the stuffing tube on. I painstaking pulled about ten feet of casing over the tube and scrunched up against the base. Once on, tied a knot on the end and was ready to go. We later discovered that it was easier to have the meat fed all the way to the tip of the tube and then pull the casing on, the little bit of meat on the end made like a cone to help feed it on.
   Once we got the casing on, we scooped the clumps of meat on to the loading tray and used the pushing rod to feed the grinder, as the meat got fed through the machine it would fill up the sausage casings. As they got about six inches long we would twist the links and started another one. We did all the breakfast ones first  then went on to the tomatoes ones, that way the breakfast ones didn't taste garlicky. I turn out to be a pretty easy process and are looking forward to using our own meat to make the next batch.

Apple Breakfast Sausage:

5 Lbs Chicken Thighs
3/4 Cups Brown Sugar
2 Apples Deiced
1 1/2 Tbls Cinnamon
1/4 Tsp Nutmeg
1 Tbls Salt
 1/2 Cup Olive Oil
We made this with the sugar to help entice the kids to eat it for breakfast, you can omit it if you want but the kids ended loving it this way.

Sun Dried Tomato and Basil:

5 Lbs Chicken Thighs
1 Cup Sun Dried Tomatoes
1/2 Cup Basil Leaves
1/2 Head of Garlic
1 Tbls Rosemary
1 Tsp Thyme
1/2 Tsp Oregano
1 Tbls Salt
1 Tsp Pepper
1/2 Cup Olive Oil

We put the tomatoes and basil in the mini processor to cut them up before mixing them with the other spices.


Thursday, October 4, 2012

The Butcher Shop

    Well not really, most butcher shops don't have a garden hose and extension cords lying on the floor. I set up a make shift work station outside the chicken coop to butcher the chickens. If you notice, the patio umbrella is over the fire pit and chicken plucker, that's because both days I butchered the chickens it rained.
   I went back and forth on how to kill the chickens. I want it to be as painless as possible for the chickens and still make sure the meat was good. I finally decided to use the kill cones which hold the chickens upside down and you cut the jugular from the bottom, then gravity helps them bleed out. I did the first eight this way and it wasn't as peaceful as they say. They say they don't feel anything when this happens, but they would move and kick around and some of them were able to jump out of the cones and lie on the ground. I would have to pick them up and put them back in to finish dying. I didn't like how it was going so I did some more research on how to do it better. I came across a woman that would swing the chickens over her head and hit the chickens head on a saw horse, knocking them unconscious. I went with this idea, and took the chickens, held them upside for a little bit, this calms them down, and hit their head from behind with a dowel. When they were knocked out and in the kill cones, it made it a lot easier to cut their jugulars to bleed out. You want them to be a live so the heart pushes the blood out, and the chicken will store longer this way. The chickens didn't feel any pain this way except for the country music going on in the background; you're not really butchering chickens unless there is country music is playing.
   After the chickens completely bleed out, I would dip them in a pot of water that is around 160 degrees for half a minute or so. This loosens up the feathers so you can pluck them. I used a wood fire under the pot, and when I got to the right temp I slid it away from the fire. This worked out well.
   I used the homemade chicken plucker and found it to spin to fast and not do a good job. Sometimes it would peel the skin off and sometimes leave the first yellow layer of skin on. It didn't take all the feathers off leaving me to still go around by hand and pluck the feathers off. I'm going to make a different plucker for next year, the tub chicken plucker called the whizbang.


   After they were all plucked, I used my butcher table to cut them up. I won't go into details on how I did it, seeing how there are plenty of websites on how to do this. I did get pretty good at it though, and found it not to be as disgusting as it seems. When you see pictures of people doing this it looks bad, but when you doing it you're not thinking about it and you're just getting it done.
   Once butchered, I put them in plastic bags for the freezer. I took a tube and taped to the end of a vacuum cleaner, and put the tube inside the cavity of the bird while in the bag. I then spun the bag around the tube and turned on the vacuum cleaner. While the vacuum cleaner was still running, I quickly pulled the tube out and spun the bag tight as possible. Then put a zip tie on it to keep it close, this made it like a vacuumed sealed bag. I left the chickens out for a few hours to "age" before freezing them.
   After doing fourteen birds, I decided to take the birds to the butcher. The chicken plucker was not doing a good enough job, and I didn't want to spend all that time and money on the birds only to have crummy product. I felt like I knew what I was doing and was comfortable doing it except for the plucking, and it would take way too long to pluck by hand. Next year I'll have a tub plucker and be able to do it right. 


Monday, October 1, 2012

Homemade Chicken Plucker


  I'm going to butcher our own chickens this year, and needed to make a chicken plucker. I had up in my shop a spindle sander and made some changes to it to make a plucker out of it. I took the sandpaper of the part that had the brushes on it and built a box around it to keep the feathers down.
   I only did a few birds so far and it works pretty well. I would like to find a way to slow it down a bit because if I leave the bird in one place to long or push too hard, it will tear the skin a bit. With a little practice I'm sure I'll get the hang of it. With 50 birds to do, I'll have plenty of practice, that's for sure.