Showing posts with label Recipes. Show all posts

Thursday, October 17, 2013

Fried Apples

   There is nothing like taking a healthy food and making it completely unhealthy. We were able to pick some apples at Uncle K and Aunt V's house this weekend and wanted to try making something other than apple pies and applesauce. Inspired by our trip to Legoland this summer, we looked up the same recipe they use for fried apples.
   You take some apples and peel them, then slice them up into fries. Then you toss them in corn starch and put them in the deep fryer, my favorite kitchen device. After a couple minutes, take them out and sprinkle with some cinnamon sugar mixture. Then enjoy them. 

I can’t say what they taste like cool because they never make it that long.

Friday, July 5, 2013

Homemade Ice Cream

   Now that we have all this milk, we’ve been playing around with making different things. Miss J made some soap, but wants to continue in the fall when things aren’t so busy. We’ve also made a couple types of cheeses, one was good but the other was a little too strong for us. We use the milk in such things as pudding, pancakes, and other baked goods, but everybody’s favorite is the ice cream.


  I found the recipe on Antiquity Oaks website, and quickly realized how easy it is to have ice cream in the freezer all the time. The recipe is simple:
4 cups goat milk  
1 cup sugar
4 egg yolks whisked
1 tsp vanilla
   You put all the ingredients in a pan and heat them up, stirring frequently. You want to bring it right up to boiling point. As soon as it starts to let out some steam I take it off the cook top. Pour the mixture into a jar and refrigerate tell it has cooled down completely, I let it sit overnight. Then pour into an ice cream maker, if you have one. We just bought one and are very happy with it. Let the machine run for twenty minutes or so. Right when the mixture stars to look like ice cream add any type of topping or extra ingredients like chocolate chips. Once done scoop out and store in the freezer.
 
  The nigerian dwarfs have higher butterfat content than any other goat or cow, so the milk makes a creamier ice cream. I can’t have a regular ice cream due to the fact it upsets my stomach, but I’m able to eat this type of ice cream. The ice cream comes out just as good if not better then store bought ice cream, the only problem is trying to keep some in the freezer due to three hungry kids.         


Monday, May 20, 2013

Rhubarb Marmalade

     I have always LOVED rhubarb! When I was a little girl my friend and I used to pick it at her farm and eat it raw. Her mother would give us bowls of sugar and we would dip and much away! My mom always made a strawberry rhubarb pie when she could get her hands on some rhubarb of her own, but my absolute favorite was when she would make stewed rhubarb. It is delicious on french vanilla ice cream, but it is also pretty darn good straight up!


     We do not have any rhubarb growing here on the farm, but I do know a few people who have some and I am shameless about begging for it! My brother's fiance gave me a handful last week and over the weekend I decided to try something new. I was pressed for time and did not really want to stew up 6 cups of rhubarb for only me to eat so I used this recipe to make rhubarb marmalade. This way I can enjoy the taste of rhubarb all year round and since I am the only one in my family who seems to like rhubarb, I'll even have some to use as gifts. I have already broken into the first 1/2 pint and I must say that it is quite delicious! It reminds me a lot of stewed rhubarb and is the perfect topping for my toast in the morning.

Rhubarb Marmalade Recipe  (Yields 8-1/2 pints)          
                                                                                                           
6 cups chopped rhubarb
6 cups sugar
2 whole oranges, pulsed in the food processor

1. Combine chopped rhubarb, sugar and processed oranges in a dutch oven.
2. Bring to a boil and then simmer until it sheets on a spoon. 
3. Pour into clean 1/2 pint mason jars leaving 1/4 inch head space. 
4. Process jars for 10 minutes in a hot water bath.


I hope you have some rhubarb or can track some down
 so you too can make this simple, yet ever so yummy recipe while rhubarb is in season. 

Mrs J :)

Sunday, April 28, 2013

Miss E's Birthday!


Miss E's present and birthday treats waiting for her to arrive.
     Miss E turned 6 last week!!! I honestly have no idea how that happened. I have been home with her every single day since the day she was born, so it is not like I've been too wrapped up in the hustle and bustle of managing work and home to notice her growing. I have truly been blessed to be with her to celebrate each and every one of her milestones. It just doesn't seem possible for her to be 6 already!

     Looking back on the past six years I can't help but tear up. You see, even though Miss E was our first baby and I was the typical over-the-edge first time mom, I just knew something wasn't quite "right" from the very beginning. I kept questioning some of her little quirks, but for the most part the "experts," friends, and family made me feel like I was just over analyzing and overreacting to things. She was a terrible sleeper. The poor thing just could not self soothe! I swear I broke the binding on our beloved copy of  The Happiest Baby on the Block by Dr. Harvey Karp. We swaddled her, shushed her, rocked her, bounced her, slept her on her side and put more hours on our baby swing in the first few months of her life than we ever would again even with TWO more babies to follow!
Miss D meeting "Piggy."
     She reached most milestones (rolling over, sitting up, etc.) on the very tail end of the typical age range. She never crawled, but I was assured that crawling wasn't a measurable milestone. She took FOREVER to really walk even after making her first few steps. Her first birthday came and went, and she was really not talking at all. We had done baby sign language with her from birth and she could easily learn and use well over 50 signs by the time she was a year. After Miss D was born (the girls are almost exactly 18 months apart) it became even more difficult to help Miss E navigate her world. We were like captives in our own home, unable to comfortably (or successfully for that matter,) go out into public without the poor thing coming unglued. Any sort of deviation from her typical routine was rough on all of us! Long story short, I finally put my foot down at her 24 Mo. checkup and insisted on a referral for a speech evaluation.
     From that moment on we were in the capable and supportive hands of  her OT, PT and SLP. From the age of 3 she attended a wonderful preschool where she had the opportunity to interact with and learn from typically developing peers. She also attended therapeutic swimming classes and Hippotherapy (Therapeutic horse riding) and we eventually got an official diagnosis of Autism from our beloved Developmental Pediatrician when she was 4. Our original goal for Miss E was for her to be all caught up so that she did not require any interventions once she reached school age. She will be finishing up her Kindergarten year in the next couple of months and I must say that while she is still receiving therapies (I'm no longer concerned about that!) and has a shared one on one, she is 100% mainstreamed and thriving. I'd say that she has easily reached and far surpassed our expectations for her since her diagnosis almost two years ago, and we really couldn't be more proud of her!
     If you are like my husband you are probably asking yourself "What does all of this have to do with the blog?" and to that I will answer-"EVERYTHING!!!" Miss E is the first reason we started to simplify our lives. She is the reason I stayed home from my teaching job and have never gone back. She is the reason we decided that it was worth making the necessary adjustments to our budget to live on one household income. Because of that choice I now have the time and energy to be more creative and thrifty. Essentially, Miss E started us on the path that would eventually lead us to having this Small Farm in the Woods.
     For her 6th birthday, Miss E went with Mr. J to pick up our new piglets. She was very excited to be the first one to "pick them out!" While she was gone Miss D, Mr. T and I made her cards, wrapped her homemade present, and put together a birthday snack. We have FOUR April birthdays in our family so I had already made her cake a couple of days before when I made one for my mother. It was a Toffee Bar Coffee Cake that was supposed to be baked in a 9x13 pan so I just made two smaller cakes in pie plates. I am not typically a fan of Toffee, but I have to say it was pretty yummy. The recipe I used for the Toffee can be found HERE. I simply substituted chopped pecans for the almonds. Below is the cake recipe I came up with. It was inspired by a recipe I found on Food.com, but I tweaked it a bit to be gluten free, and we topped it with whipped cream. YUM!
   
After Miss E had introduced everyone to our 4 new piggies and they were relatively settled into the new digs, we came inside for cake and presents. Miss E had asked for a bed for her stuffed animals for her birthday. Plan A was for Mr. J to make one, but as time ran out plan B was to run to the Mill Store to get one. Thankfully, I ended up finding and old planter at my aunt's house while I was helping her move that fit the bill perfectly. I guess God had a Plan C to make our lives even easier!
 I made a mattress for the bed out of the old changing table foam by simply cutting it to size and covering it in some fleece I had on hand. I used the same fleece to make a sheet set for the bed. The pillow is made out of an upcycled prefold diaper and stuffing from an old pillow. The quilt is a work in progress. It needs to be made longer and wider, but for my first attempt, I think it looks okay. I will also make a decorative pillow sham to match once I add on to the quilt in a few days. It seems to meet Miss E's approval and more importantly her beloved stuffed animals seem to love their new bed!!!
     While Miss E and Mr. J were out retrieving the piglets I realized that I had no good way of wrapping the bed, so I whipped up a simple cloth gift bag with fabric I had on hand and tied it with a ribbon. I had plenty of time before they were expected back so I decided to reinforce all of the seams with a zig zag stitch. I also pressed and hemmed the top for a neat finish. In a pinch these steps are not at all necessary but now we have a cool, HUGE, reusable gift bag that is made to last!


     Gluten Free Toffee Coffee Cake
1 1/2 C. brown rice flour                    1. Butter 9 x 13 in. pan or 2 pie plates
1/3 C. potato starch
2 TBSP. tapioca flour                            2. Beat together flour, both sugars, butter and salt until mix. 
1 tsp. xanthan gum                                  resembles a course meal. Set aside 1/2 C for topping. 
1 C. brown sugar                                  
1/2 C. white sugar                                 3. Stir in baking soda and add buttermilk, egg and vanilla; beat until
1/2 C. butter, at room temp                   just combined.
1/2 tsp. salt
7 1/2 oz. toffee, crushed                       4. Transfer to buttered dish(es.)
1 tsp. baking soda
1 C. buttermilk                                     5. Add Toffee to reserved topping and mix. Sprinkle over cake.
1 large egg
2 tsp. vanilla                                         6. Bake at 350 degrees for 30 mins., or until golden brown.

*If you want to make this with regular flour use 2 C. and omit the brown rice flour, potato starch, tapioca flour and xanthan gum.                      


All in all I think Miss E had a good day. It is nice for all of us to have her birthday on April vacation. It really is wonderful to see the young lady that she has become and to celebrate all of her success.

Make a wish, sweet girl. The sky's the limit!

One Proud Mommy, Mrs. J :)


Friday, January 11, 2013

Sausage Fest

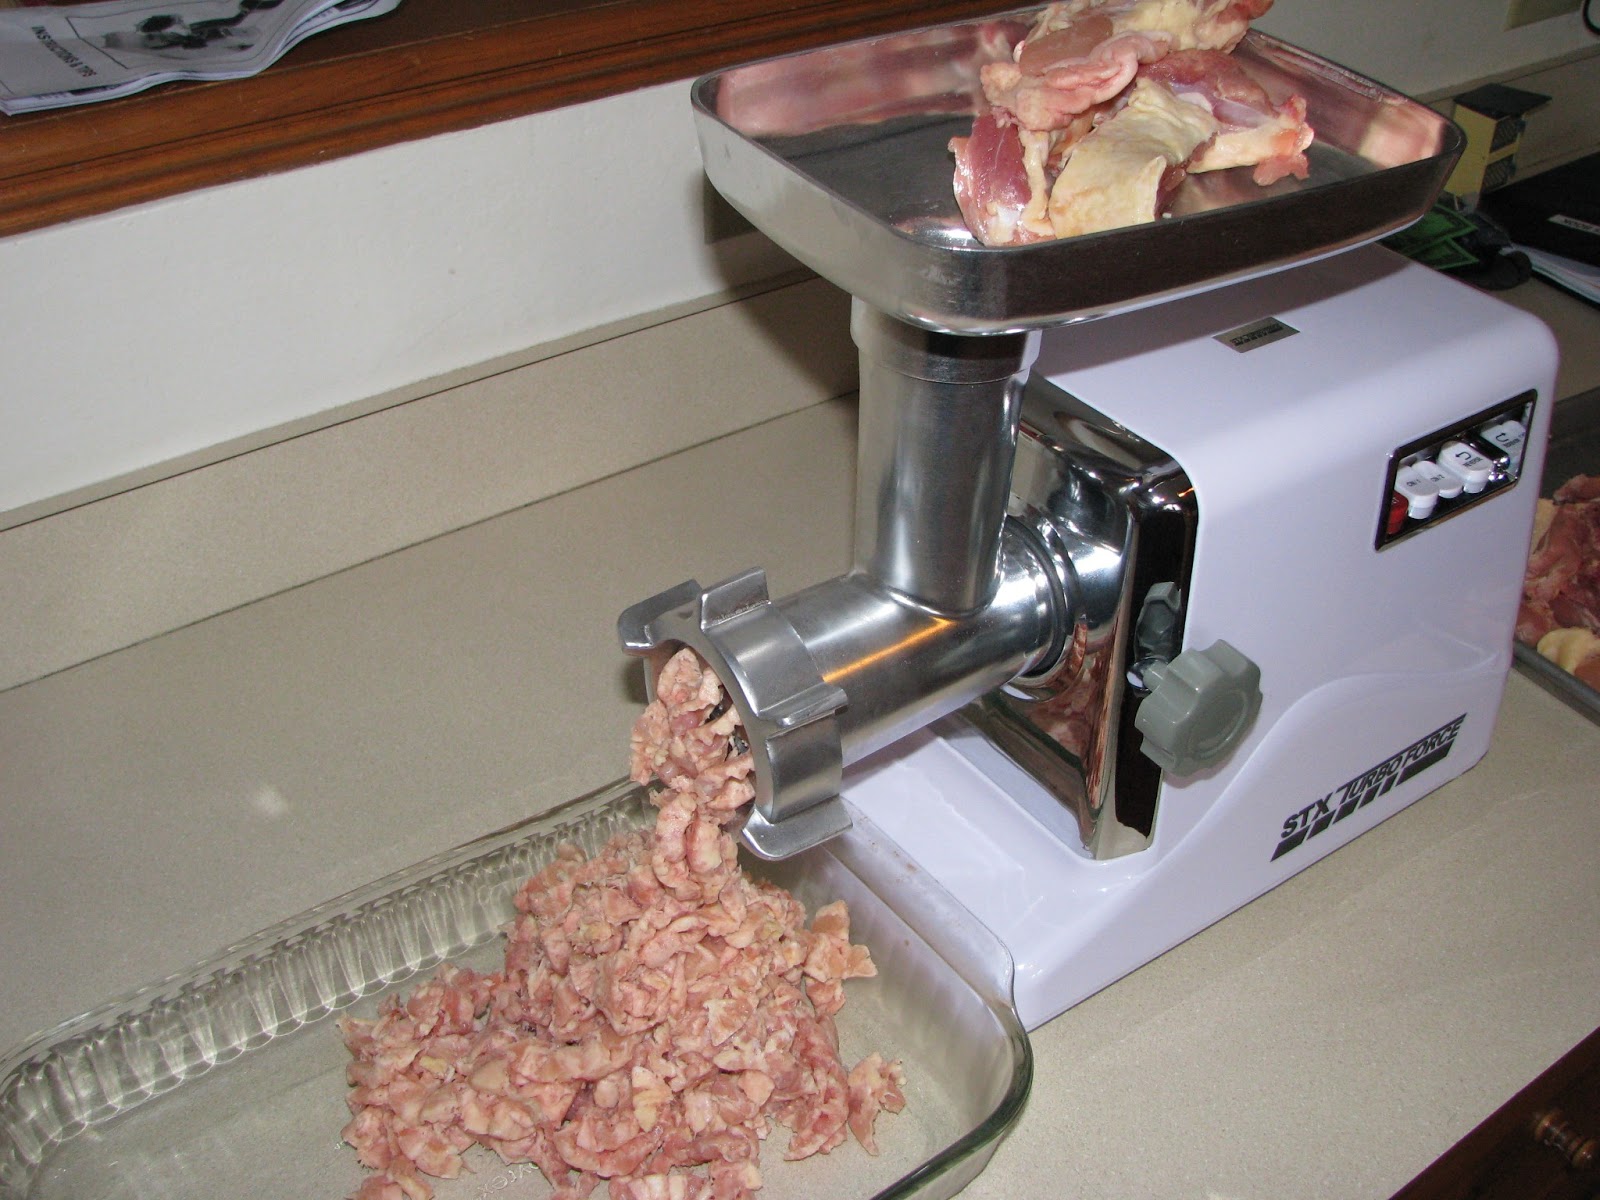
   For Christmas, my mother-in-law got me a meat grinder/sausage maker for us to use as we get into more processing of our own meat. After doing a lot of research on them, I decided on the STX turbo Force 3000. I added it to my Amazon wish list, and low and be hold I ended up getting it for Christmas. I couldn't wait to get through the aftermath of Christmas and start using it.
   I was able to purchase some natural casings, hog intestinal, from the local butcher shop and they also were able to give me some advice on sausage making. We didn't want to waste any of our natural pork or chicken on our first time trying to make sausage, so I bought ten pounds of chicken thighs at the store. We wanted to try two different types of chicken sausage, so I divided the ten pounds of chicken into two piles, cut out the bone, and then cut the meat into one inch strips, leaving the skins on.
  I then put the strips on a pan, and put them into the freezer for about half an hour. They say the meat grinder will work better if the meat is almost solid. Once the chicken strips were firm but not frozen, it was time to start grinding. We started with the attachment that does the coarse meat first. It worked very well, didn't have to force the meat in at all.
   We piled the meat on a dish as it came out of the grinder and then put on the finer attachment and ran the meat through the grinder again, as the meat came out we put the meat into two different bowels. We then added the two different seasonings that we made a head of time. Using a spoon we mixed up the meat thoroughly making sure the spices were incorporated into the meat. They say that you should let the meat rest in the fridge overnight so the flavors get into the meat, but didn't want to wait that long, besides the flavors will be in the sausage once made and will have plenty of time to rest then. Before we used the meat in the sausage, we fried up little patties on the stove to try them out, and see if they tasted good. We then started getting ready to stuff the casings.
    I put the coarse attachment back on, but on the end of it I also put the stuffing tube on. I painstaking pulled about ten feet of casing over the tube and scrunched up against the base. Once on, tied a knot on the end and was ready to go. We later discovered that it was easier to have the meat fed all the way to the tip of the tube and then pull the casing on, the little bit of meat on the end made like a cone to help feed it on.
   Once we got the casing on, we scooped the clumps of meat on to the loading tray and used the pushing rod to feed the grinder, as the meat got fed through the machine it would fill up the sausage casings. As they got about six inches long we would twist the links and started another one. We did all the breakfast ones first  then went on to the tomatoes ones, that way the breakfast ones didn't taste garlicky. I turn out to be a pretty easy process and are looking forward to using our own meat to make the next batch.

Apple Breakfast Sausage:

5 Lbs Chicken Thighs
3/4 Cups Brown Sugar
2 Apples Deiced
1 1/2 Tbls Cinnamon
1/4 Tsp Nutmeg
1 Tbls Salt
 1/2 Cup Olive Oil
We made this with the sugar to help entice the kids to eat it for breakfast, you can omit it if you want but the kids ended loving it this way.

Sun Dried Tomato and Basil:

5 Lbs Chicken Thighs
1 Cup Sun Dried Tomatoes
1/2 Cup Basil Leaves
1/2 Head of Garlic
1 Tbls Rosemary
1 Tsp Thyme
1/2 Tsp Oregano
1 Tbls Salt
1 Tsp Pepper
1/2 Cup Olive Oil

We put the tomatoes and basil in the mini processor to cut them up before mixing them with the other spices.


Friday, January 4, 2013

Homemade Corn Nuts

    This past summer, we had a surplus of sweet corn that we couldn't eat in time before it got too much of a starchy taste, so we left them on the stalk to dry out. After the stalks dried up we picked the corn and hung it up in the basement to finish drying. We weren't sure what we were going to do with it at the time, but after eating a bag of corn nuts, we decided to try to make our own.
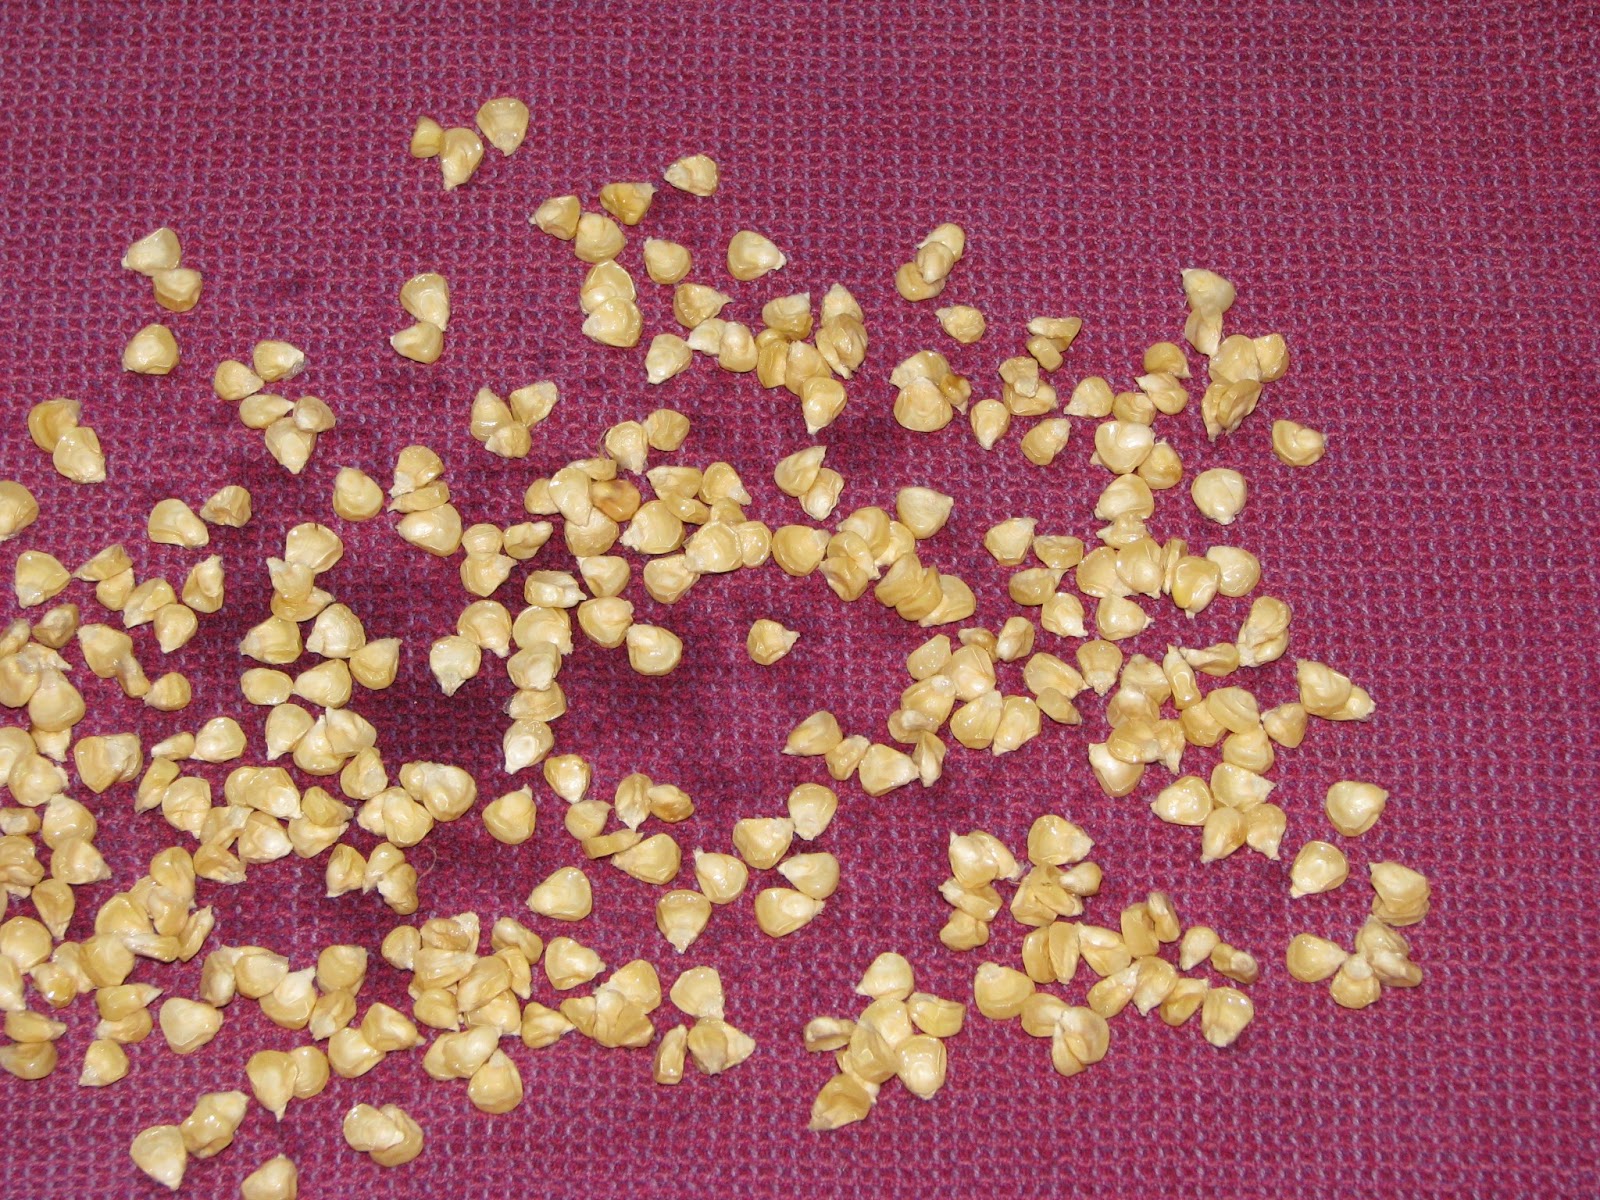
   What I did first was, shuck the corn off the cob and then put the corn into a bowl with enough water to cover the kernels. I left the corn in the fridge for three days or so. The water that is absorbed helps make the kernels almost pop and swell up. After the kernels absorbed some the water, I strained them through a colander and, then laid them out on a dish towel to air dry.
   While they were drying, I heated up the deep fryer to 375 degrees. If you don't have deep fryer, you need to get one they're great. Once dried I put them in the deep fryer for about seven minutes, once they started looking golden brown, I took them out and dried them on a paper towel. I then sprinkled them with some salt, and the whole family enjoyed eating them up.  
   The kinds you buy at the store are made out of a different type of corn, Hickory King Corn, but we wanted to try to use the corn we already had.


I know there is nothing healthy about taking a starchy, sugary food and deep frying it and then puting salt on it, but who can be healthy all the time?


Thursday, November 29, 2012

Butt Roast

   We had my mother and one of her friends over for dinner recently, and wanted to cook up some of our fresh pork. We decided to use the butt roast, even though most people use this cut to turn into pulled pork, we cooked like a regular roast.
   What we did was, heat up a pan with some oil in it and seared each side of the roast for about a minute per side. Then cut slots in the roast and put pieces of garlic and rosemary inside it. Sprinkled salt, pepper, and some more rosemary on the top, and put it in the oven at 325 degrees for about two and halve hours. Once it hit 140 degrees inside the pork it was done.

   We served it up with some roasted vegetables from our garden and some leftover rice from Thanksgiving, someone has to eat the leftovers, and it turn out to be a awesome meal. The pork came out great, even though the butt roast is considered one of the cheaper cuts, it tasted like one of the best roast I ever had, and we're excited to continue eating our own homegrown food.

Saturday, September 29, 2012

Squash Recipes

     In an effort to both save money on groceries lately (due to some party planning expenses for Miss D's upcoming birthday celebrations,) and to use up some of the delicious squashes that we recently harvested from our garden, I have been experimenting a lot in the kitchen lately. I started out searching allrecipes.com and then let my available groceries and imagination guide me.


Roasted Butternut Squash and Garlic Lasagna Recipe (Serves 12)
1 Lg. butternut squash, halved and seeded
3 T olive oil
1/2 tsp. salt
1/4 C. butter
2-4 cloves of garlic, minced
1/4 C. flour ( I used my own GF blend)
1 quart milk
salt and pepper to taste
1 Pkg. Lasagna Noodles (I used GF)
1 1/2 C. parm. cheese
1/2 C. shredded mozz. cheese
1 lb. ground beef, chicken or turkey
1. Preheat the oven to 450 degrees F. Cut the butternut squash in half lengthwise. Scoop out the flesh and seeds and set aside. Brush each squash half with olive oil  and season with salt. Roast until golden and easily pierced with a knife, approx 45-50 mins. Allow to cool 15-20 mins. and then scoop flesh out into a bowl. I used my immersion blender at this point to puree the squash, but you can either use a food processor or potato masher depending on the consistency you desire.

2. Brown meat in a skillet and drain. Set aside for later. ( for a vegetarian option you can easily omit this part. We are big meat eaters in our house, so I actually added it to the recipe when I modified.)

3. Heat butter in Lg. skillet over med-low heat. Stir in garlic and cook until softened. Stir in flour and cook for 3 mins. Whisk in the milk until smooth. Bring to a boil and then simmer on low until thickened, about 10 mins. Stir in the butternut squash and season with salt and pepper. 

4. Reduce oven temp to 375 degrees F. Grease 9 x 12 baking dish ( I used the same one I roasted the squash in as it was pretty much already greased.) Layer 1/3 of the butternut sauce, 1/3 of the noodles, 1/3 of the meat and 1/3 of the parm.cheese. Repeat process 2 more times and top with all of the mozz. cheese. Cover with foil and cook for 30 mins. Remove foil and then cook until top is bubbly and brown (approx.10 mins.)

*Optional Step 5. Make Roasted Butternut Squash Seeds
Reduce oven temp. to 200 degrees F. Separate seeds from flesh  and spread out on a cookie sheet. Salt generously with kosher sea salt and roast for approx. 30 mins. I would have included a picture of our roasted seeds however the kids have already gobbled them all up! 

Butternut Squash & Turkey Chili Recipe (serves 12)
2 T olive oil
1 onion, chopped, 
2 garlic cloves, minced
1 lb. ground turkey
1 Lg. butternut squash, peeled, seeded and diced
1/2 C. chicken broth
1 16oz. bag frozen corn
2  Lg. cans petite diced tomatoes (or 4 C. fresh/canned tomatoes, diced)
2 (15oz.) cans kidney beans
1 T chili powder
1 T cumin
1 T paprika
1 tsp. garlic powder
1/2 tsp. salt

1. Heat olive oil in Lg. pot over med. heat. Stir in onion and garlic. Cook and stir for 3 mins. Add turkey and stir until crumbly and no longer pink.

2, Add the butternut squash, chicken broth, tomatoes, kidney beans, and corn. Season with chili powder, cumin, paprika, garlic powder and salt. Bring to a low boil then reduce heat to med-low and simmer until squash is tender, about 20 mins. 

     As it turns out, both of these recipes ended up being so good that I plan to make them, along with a salad, for lunch at Miss D's birthday party in a couple weeks. I am also working on a butternut squash frosting recipe for her cake. I tried one last year and it was okay, but I really want to find one that I'm more excited about this year. Lord knows we have plenty of butternut squash!!!

     If you are a regular follower, I am sure that you have noticed that I am new here. Better known as "the wife," as Mr. J so lovingly refers to me, I am the polar opposite of my husband. While he is a man of few words, you can see that I can tend to ramble quite a bit. I have been a stay at home mom for over 5 years now and with 3 small kids at home I do not have a lot of spare time, but I am going to try to do my best to blog a bit myself. We are really trying to simplify things in our home and as part of our "less is more" approach, I have recently cancelled my Facebook account. The plan is to have more time with my family, to craft, cook, clean, and farm. In order to keep in touch with our family and friends who do not live locally, I will also share more about the kids and our day to day activities. Stay tuned and brace yourselves for the mini-novels that will be coming your way courtesy of Mrs. J!!! :)


Monday, September 24, 2012

Carrots and Squashes

   We picked some of the squashes this weekend and stored them in the root cellar. Even with all that we picked there is still about a dozen more on the vine ripening.
   We also pulled up the carrots, which the kids love to do. All though we could've left them out there, with things starting to get a little busy we decided to get them up now before ran out of time.
We planted a different kind of carrot called Hercules this year, and even though we had less plants we got more of a yield compared to last year, due to the size of the carrots. We ordered them from Johnny seeds and will do the same next year, very impressed with the quality and taste.


Thursday, September 6, 2012

Making Tomato Sauce

   We planted 40 tomato plants this year, with about half of them being plum tomatoes. We plan to make salsa and other things out of them, but what we really wanted to do this year is stock up on tomato sauce.
   Without an electric tomato strainer we had to come up with a way to make sauce. After washing the tomatoes, we cut out the stem base and put them into a food processor. We processed them until they turn into a pure liquid form. Then we poured them into a sieve that was over a big bowl. With a spatula we turned, scraped, and pushed the mash through the sieve leaving only the seeds and skins behind. After we had a good amount of juice, we poured into a pot, and brought it to boil on the cook top. As it reduced we kept adding more to the pot. Once we ran out of tomatoes we let it reduce to the desired consistency that we were looking for. One grocery bag of tomatoes made 2 1/2 qts. of sauce. We plan to make spaghetti sauce, pizza sauce, and ketchup out of the sauce later on, along with tomato soup, of course. With 40 plants we'll have plenty of sauce to make.


Friday, July 27, 2012

Homemade Mayo

MAYONNAISE
    Our latest adventure in the kitchen was making mayonnaise that we later turned some into ranch sauce. We first took a couple of eggs yolks and put them in the food processor with a little bit of salt, dry mustard, and sugar. With the chopping blade on we blended it all up tell fully combined. Then we mixed a little bit of lemon juice and white wine vinegar up in a separate bowl. With the blade running we added half the lemon/vinegar mixture into the food processor. Then we took some corn oil, and with the blade still running, added a few drops and waited a few seconds. After waiting we added a few more drops and waited a little bit more, we continued this process until we saw the mixture start to emulsify. Once we got to this point we just started pour the oil in very slowly, giving the mixture a chance to whip up. We stopped once we got to half the oil was used up, then added the rest of the lemon/vinegar into processor. We then poured the rest of the oil in very slowly. After all the mixing was done we let it set out at room temperature for a couple of hours, then put it in a container and put in the fridge. They say it will last a week or so.

Here is a list of ingredients:
2 Egg Yolks
1 Tsp Salt
1 Tsp Dry Mustard
1 Tbsp Sugar
4 Tsp Lemon Juice
2 Tbsp White Wine Vinegar
2 C Corn Oil

All in all it came out very good and is something we'll continue to make.


RANCH
   We took it one step forward by making our own ranch dipping sauce next. It ended up being very simple to make. We took 1 cup of the mayo and 1 cup sour cream and mixed them up. We then added 2 tbsp of chopped parsley, 2 tbsp of chopped chives, and 1 tbsp of dill weed. Mixed it all up, and we were done. I think next time we'll get a little more creative and add some different spices along with the other ones. We ended up trying out on some fresh lettuce from the garden and it turn out great.
   Both condiments are getting us that much closer to being self sufficient.